Halloween is a great time to get kids into the kitchen and let them have a little fun with festive food. From silly monster treats and Oreo spiders to chocolate-dipped pretzels and spooky mummy brownies, there are plenty of easy Halloween treats that children can help make at home.
These 9 Halloween treats for kids use familiar ingredients, simple decorating ideas, and plenty of colorful sprinkles, candy eyes, and chocolate. Some recipes are no-bake, while others involve a little baking with an adult’s help. They’re great for Halloween parties, classroom celebrations, family movie nights, or a fun afternoon of making sweet snacks together.
The best part? Kids can help with stirring, dipping, decorating, and adding their favorite toppings. Just keep adult supervision in place for hot mixtures, ovens, microwaves, and melted chocolate.
Quick Summary
- Best gooey treat: Halloween Monster Rice Krispie Treats
- Best spooky cookie: Oreo Spider Cookies
- Best easy party snack: Chocolate-Dipped Halloween Pretzel Rods
- Best brownie idea: Halloween Mummy Brownies
- Best no-bake project: Monster Marshmallow Pops
- Best fruity Halloween treat: Halloween Chocolate-Covered Strawberries
- Best sweet-and-salty snack: Candy Corn Popcorn Mix
- Best bite-sized dessert: Halloween Mini Donuts with Sprinkles
- Best classic cookie: Peanut Butter Spider Cookies
1. Halloween Monster Rice Krispie Treats
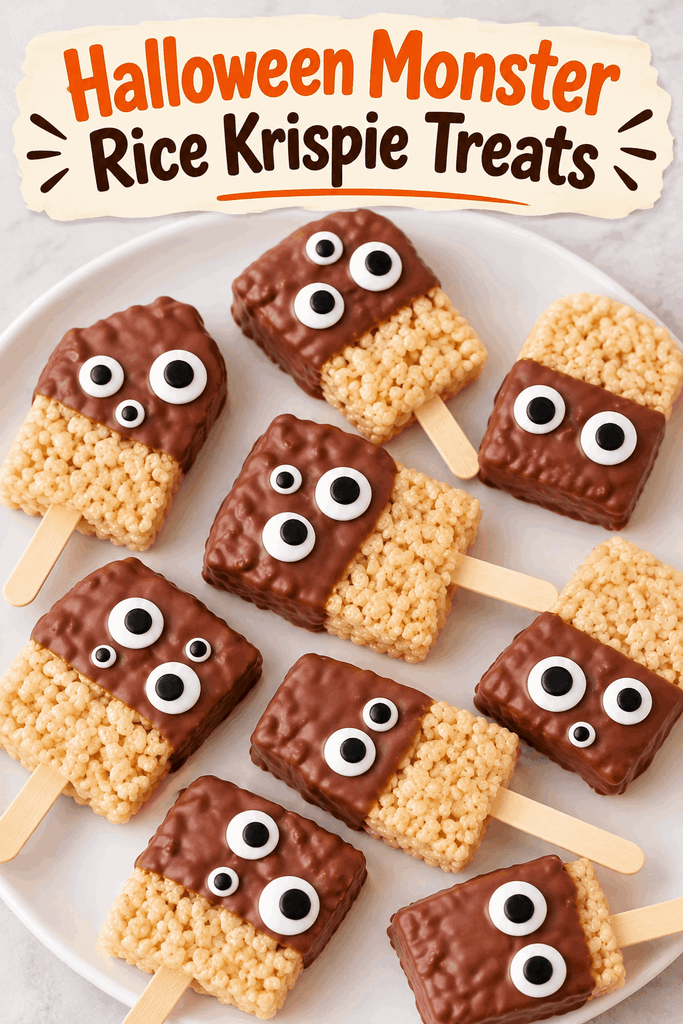
Halloween Monster Rice Krispie Treats are chewy marshmallow cereal bars decorated with colorful candy melts, candy eyes, and silly monster faces. They’re easy to shape, fun to decorate, and don’t require baking. A nonstick 9-by-13-inch baking pan makes it easier to press and cut the cereal mixture.
Prep Time: 20 minutes
Setting Time: 30 minutes
Servings: 12
Ingredients
- 6 cups crispy rice cereal
- 4 tablespoons unsalted butter
- 1 package (10 ounces) mini marshmallows
- ½ teaspoon vanilla extract
- Green, purple, and orange candy melts
- Candy eyes
- Halloween sprinkles
- Cooking spray or a little extra butter for the pan
Instructions
- Lightly grease a 9-by-13-inch baking pan with cooking spray or butter.
- Melt the butter in a large saucepan over low heat. Add the mini marshmallows and stir until completely melted and smooth.
- Remove the pan from the heat and stir in the vanilla extract.
- Add the crispy rice cereal and gently fold until every piece is coated with the marshmallow mixture.
- Transfer the mixture to the prepared pan. With lightly greased hands or a spatula, gently press it into an even layer.
- Let the mixture cool for about 20–30 minutes, until firm enough to cut.
- Cut into squares or rectangles.
- Melt the candy melts according to the package directions. Drizzle or spread different colors over each treat.
- Add candy eyes and Halloween sprinkles while the coating is still soft.
- Allow the decorations to set before serving.
2. Oreo Spider Cookies
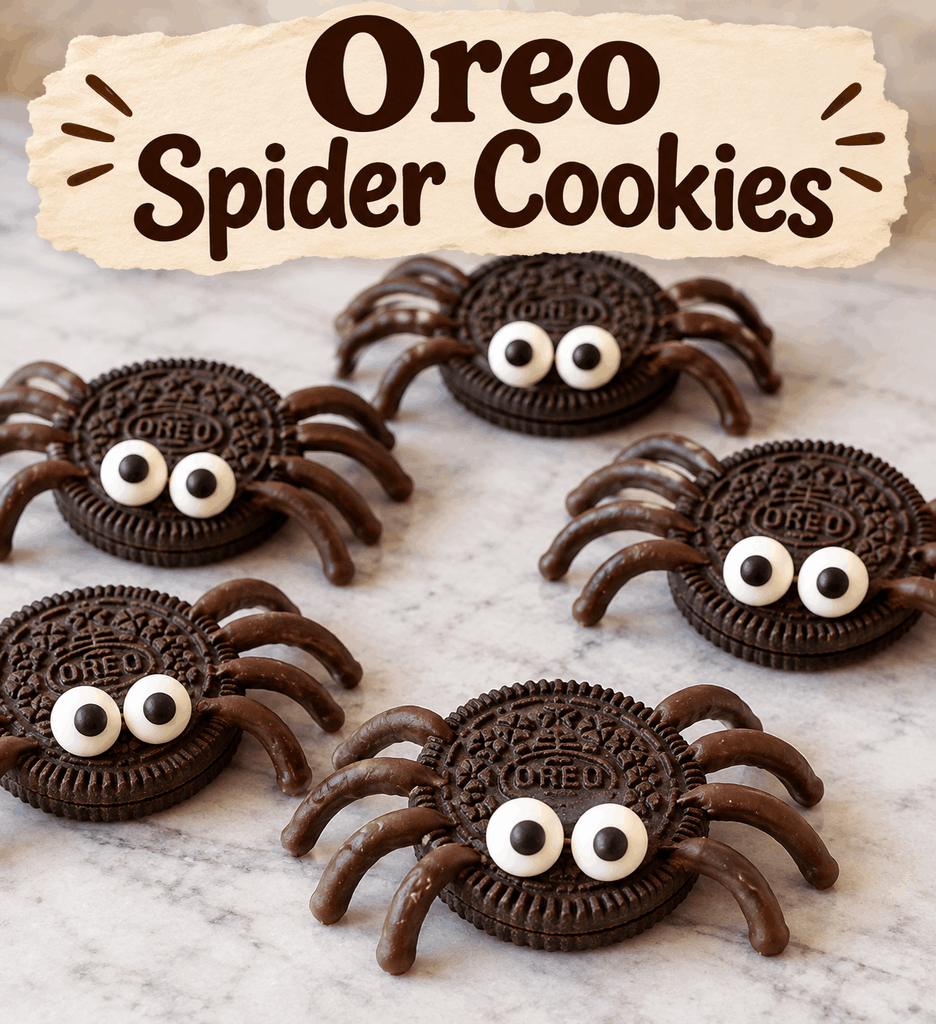
Oreo Spider Cookies turn ordinary sandwich cookies into adorable Halloween spiders using pretzel sticks, candy eyes, and melted chocolate. They’re a simple no-bake Halloween dessert that kids can assemble and decorate themselves. A small piping bag set helps make adding the spider details easier.
Prep Time: 20 minutes
Setting Time: 15 minutes
Servings: 12
Ingredients
- 12 Oreo cookies
- 48 thin pretzel sticks
- ¼ cup chocolate chips
- 24 candy eyes
- 1 teaspoon coconut oil (optional, for thinning chocolate)
Instructions
- Line a baking sheet or large plate with parchment paper.
- Carefully twist each Oreo cookie apart. Keep the cream filling on one side.
- Break each pretzel stick into two shorter pieces. You’ll need four pieces for each spider.
- Press four pretzel pieces into the cream filling on each side of the cookie to create eight spider legs.
- Place the other cookie half back on top and gently press to secure the legs.
- Melt the chocolate chips in a microwave-safe bowl in short intervals, stirring between each one. An adult should handle the hot bowl.
- Use a small amount of melted chocolate to attach two candy eyes to each Oreo.
- Add extra chocolate details for a little spider smile, when desired.
- Let the cookies sit until the chocolate has set.
3. Chocolate-Dipped Halloween Pretzel Rods
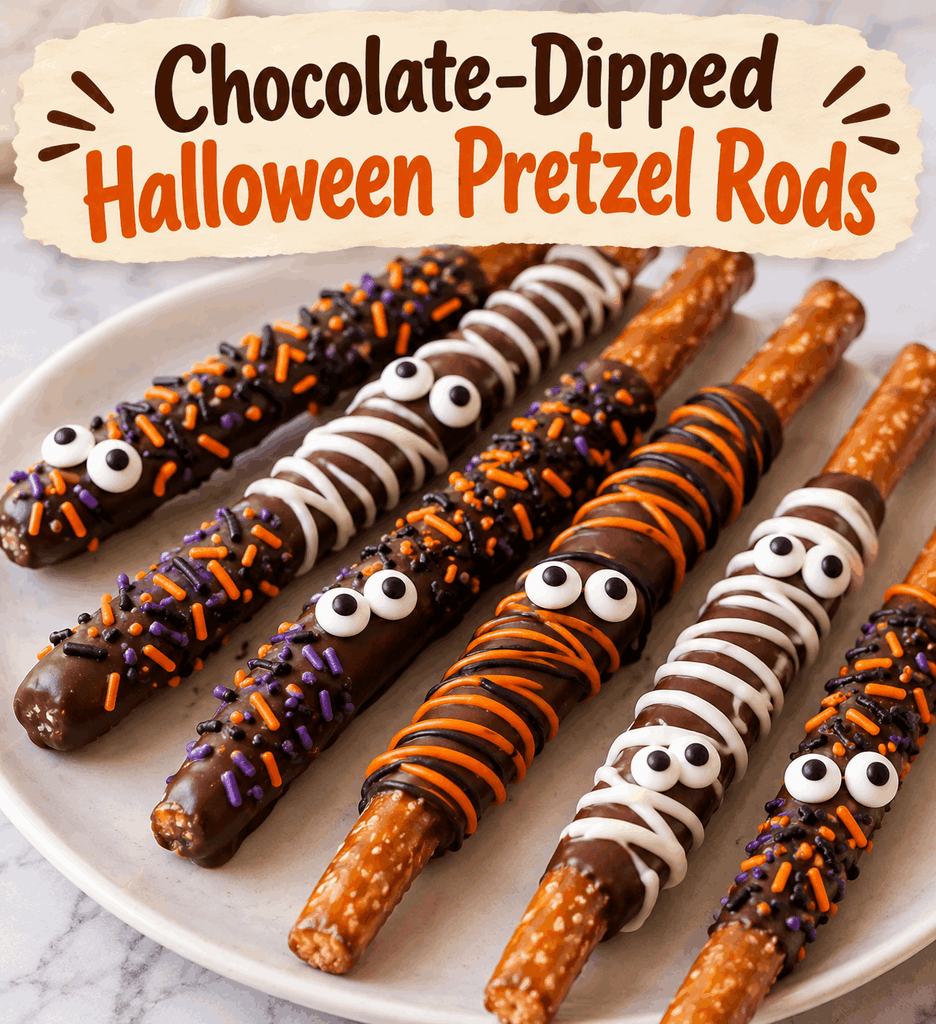
Chocolate-Dipped Halloween Pretzel Rods are crunchy, sweet-and-salty Halloween snacks covered in melted chocolate and colorful festive decorations. They’re easy to customize with orange, purple, green, and black sprinkles, making them a great treat for Halloween parties and goodie bags. A microwave-safe melting bowl is useful for preparing the chocolate coating.
Prep Time: 15 minutes
Setting Time: 20 minutes
Servings: 12
Ingredients
- 12 pretzel rods
- 1 cup white chocolate chips or white candy melts
- 1 cup milk chocolate chips or chocolate candy melts
- Orange, purple, and green candy melts
- Halloween sprinkles
- 1 teaspoon coconut oil, as needed
Instructions
- Line a baking sheet with parchment paper.
- Melt the white chocolate and milk chocolate separately according to their package directions. Stir until smooth.
- Dip each pretzel rod into the melted chocolate, covering about two-thirds of its length.
- Gently shake off excess chocolate and place the pretzel rods on the prepared baking sheet.
- While the chocolate is still soft, add Halloween sprinkles.
- Melt the colored candy melts separately. Drizzle different colors over the dipped pretzels using a spoon or piping bag.
- Let the pretzel rods sit at room temperature until the coating is firm. Refrigerate briefly to speed up setting, when needed.
- Arrange the finished pretzels on a serving plate or wrap them individually for party favors.
4. Halloween Mummy Brownies
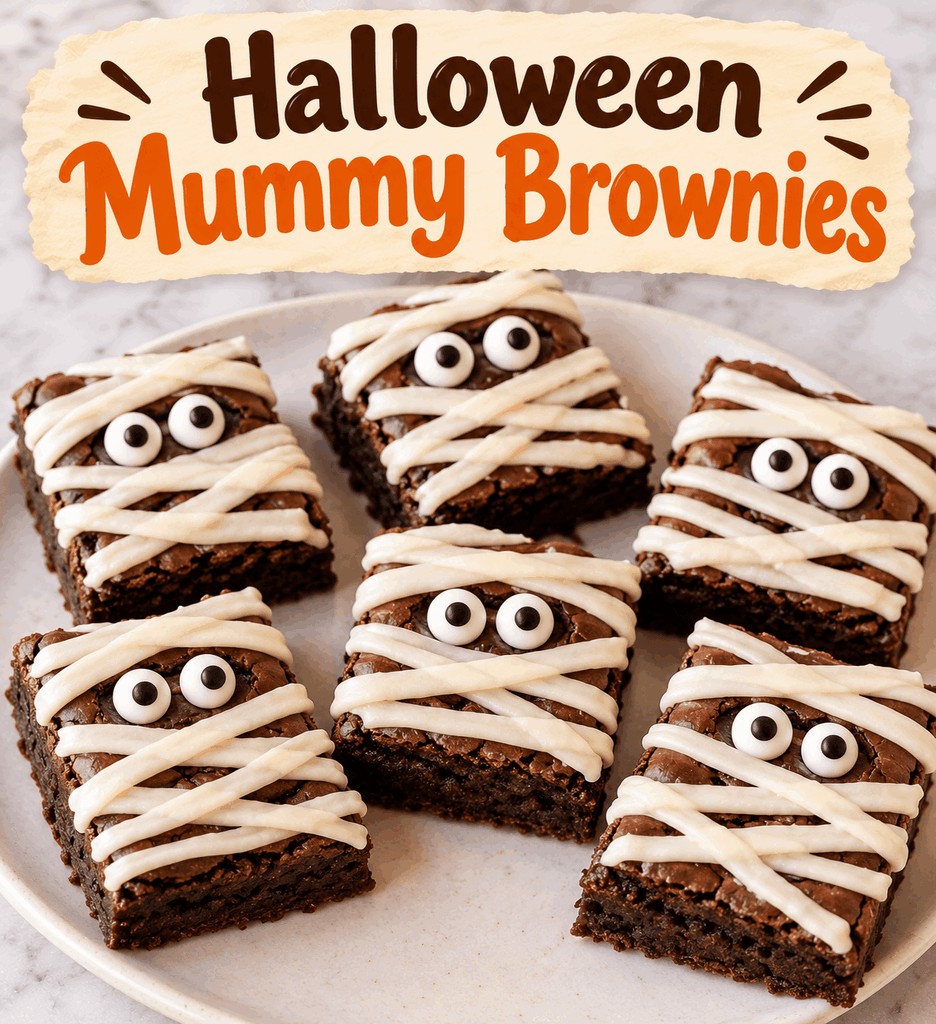
Halloween Mummy Brownies are fudgy chocolate brownies decorated with white chocolate or icing strips to look like little mummies. Candy eyes complete the spooky design, making these brownies a fun addition to Halloween dessert tables. A square brownie baking pan is perfect for baking evenly sized brownie squares.
Prep Time: 15 minutes
Cook Time: 25–30 minutes
Cooling Time: 45 minutes
Servings: 9
Ingredients
For the brownies:
- ½ cup unsalted butter, melted
- 1 cup granulated sugar
- 2 large eggs
- 1 teaspoon vanilla extract
- ⅓ cup unsweetened cocoa powder
- ½ cup all-purpose flour
- ¼ teaspoon salt
- ¼ teaspoon baking powder
For decorating:
- 1 cup white chocolate chips or white candy melts
- 18 candy eyes
- 1 teaspoon coconut oil, as needed
Instructions
- Preheat the oven to 350°F (175°C). Grease an 8-inch square baking pan and line it with parchment paper.
- In a large bowl, whisk together the melted butter and sugar.
- Add the eggs and vanilla extract. Whisk until smooth.
- Stir in the cocoa powder, flour, salt, and baking powder until just combined.
- Spread the batter evenly in the prepared pan.
- Bake for 25–30 minutes, or until a toothpick inserted near the center comes out with a few moist crumbs.
- Let the brownies cool completely before cutting them into 9 squares.
- Melt the white chocolate or candy melts according to the package directions.
- Drizzle thin lines across each brownie to create the mummy bandages.
- Place two candy eyes on each brownie while the coating is still soft.
- Allow the decorations to set before serving.
5. Monster Marshmallow Pops
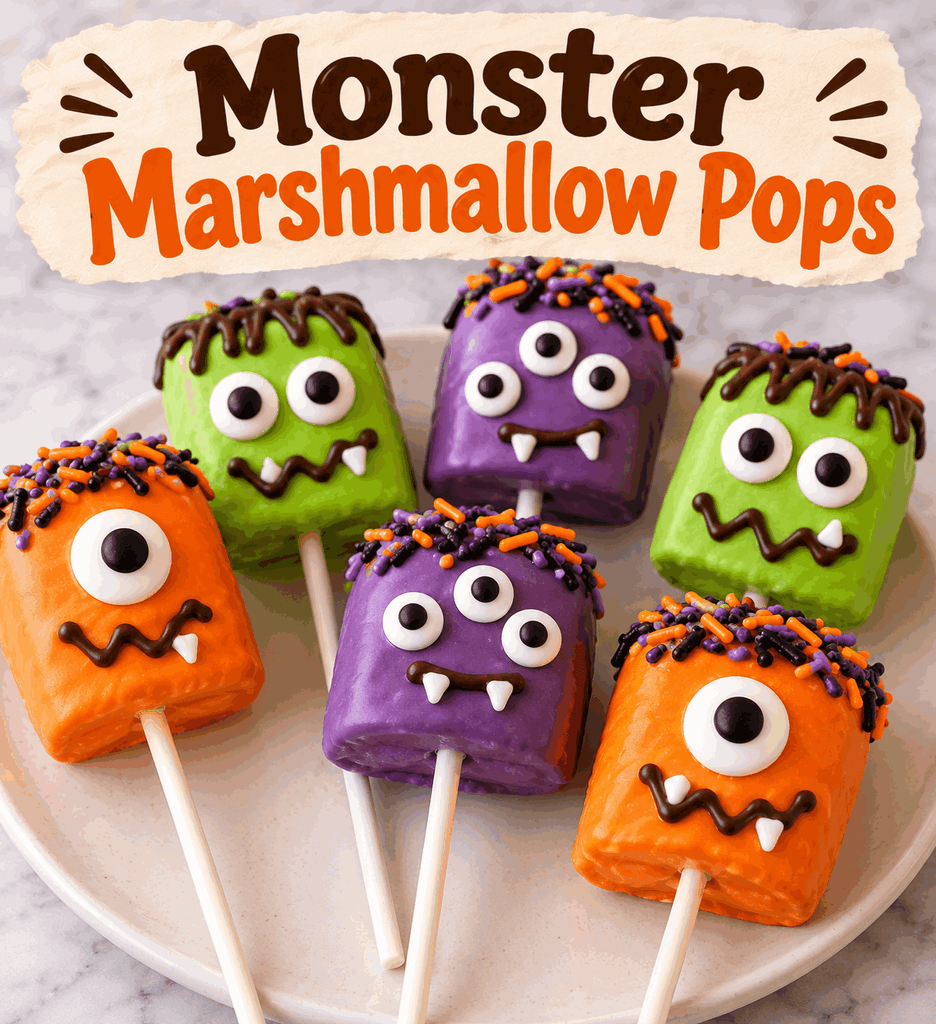
Monster Marshmallow Pops are fluffy marshmallows dipped in colorful candy coating and decorated with candy eyes and sprinkles. They’re one of the easiest Halloween treats for kids because there’s no baking involved, and every pop can have a different monster face. A set of paper lollipop sticks makes these treats easy to hold and decorate.
Prep Time: 20 minutes
Setting Time: 20 minutes
Servings: 12
Ingredients
- 12 large marshmallows
- 12 paper lollipop sticks
- 1 cup green candy melts
- 1 cup purple or orange candy melts
- Candy eyes
- Halloween sprinkles
- 1 teaspoon coconut oil, as needed
Instructions
- Line a baking sheet with parchment paper.
- Gently push one lollipop stick into the center of each marshmallow.
- Melt the green and purple or orange candy melts separately according to the package directions.
- Dip each marshmallow into the melted coating, turning it gently to cover the sides.
- Allow excess coating to drip back into the bowl.
- Add candy eyes and sprinkles while the coating is still soft.
- Place each marshmallow pop on the parchment-lined baking sheet or stand it upright in a holder.
- Let the coating set completely before serving.
6. Halloween Chocolate-Covered Strawberries
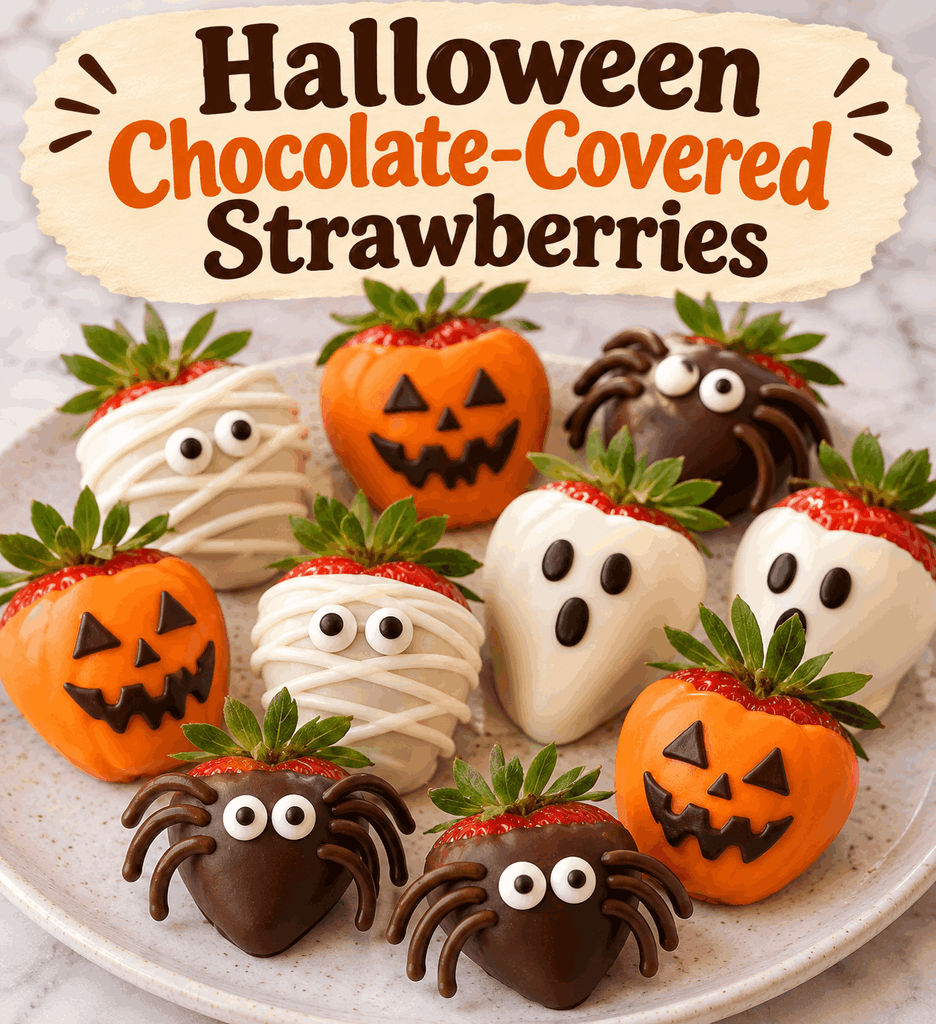
Halloween Chocolate-Covered Strawberries are fresh strawberries dipped in melted chocolate and decorated as spooky ghosts, little pumpkins, or colorful Halloween treats. They offer a fruity alternative to cookies and brownies while still feeling festive and sweet. A double boiler set can help melt chocolate gently and evenly.
Prep Time: 20 minutes
Setting Time: 20 minutes
Servings: 12
Ingredients
- 12 fresh strawberries
- 1 cup white chocolate chips
- 1 cup orange candy melts
- ¼ cup mini chocolate chips
- 2 tablespoons dark chocolate chips
- 1 teaspoon coconut oil, as needed
Instructions
- Wash the strawberries and dry them thoroughly with paper towels. Any moisture can cause melted chocolate to become difficult to work with.
- Line a baking sheet with parchment paper.
- Melt the white chocolate and orange candy melts separately according to the package directions.
- Hold each strawberry by its green stem and dip some into white chocolate and others into orange coating.
- Gently shake off the extra coating and place the strawberries on the prepared baking sheet.
- For ghost strawberries, use mini chocolate chips or melted dark chocolate to add two eyes and a small mouth.
- For pumpkin strawberries, drizzle a little melted dark chocolate over the orange coating to create simple pumpkin lines.
- Let the chocolate set completely before serving.
7. Candy Corn Popcorn Mix
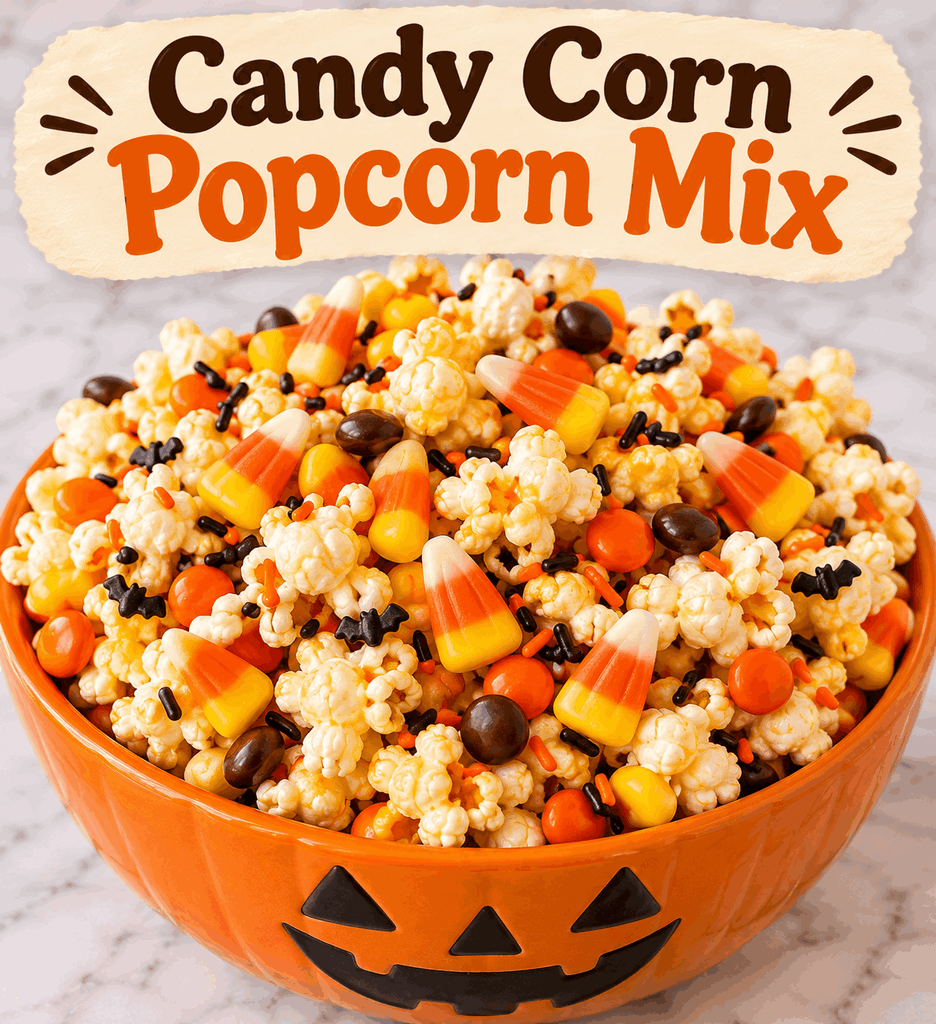
Candy Corn Popcorn Mix is a sweet-and-salty Halloween snack made with popcorn, candy corn, pretzels, and colorful chocolate candies. It takes just a few minutes to assemble and is easy to serve in bowls or individual snack bags for Halloween parties. A large popcorn serving bowl gives kids plenty of room to mix everything together.
Prep Time: 10 minutes
Servings: 8
Ingredients
- 8 cups popped popcorn
- 1 cup candy corn
- 1 cup mini pretzels
- ½ cup orange and yellow chocolate candies
- ½ cup mini marshmallows
- ½ cup white chocolate chips
- 1 teaspoon coconut oil, as needed
- Halloween sprinkles
Instructions
- Place the popped popcorn in a large mixing bowl. Remove any unpopped kernels.
- Add the candy corn, mini pretzels, chocolate candies, and mini marshmallows.
- Melt the white chocolate chips with a little coconut oil in a microwave-safe bowl, stirring between short heating intervals. An adult should handle the hot bowl.
- Drizzle the melted white chocolate over the popcorn mixture.
- Gently toss everything together with a large spoon or spatula.
- Sprinkle Halloween decorations over the top.
- Spread the mixture on a parchment-lined baking sheet and allow the chocolate to set.
- Break it into snack-sized clusters and serve.
8. Halloween Mini Donuts with Sprinkles
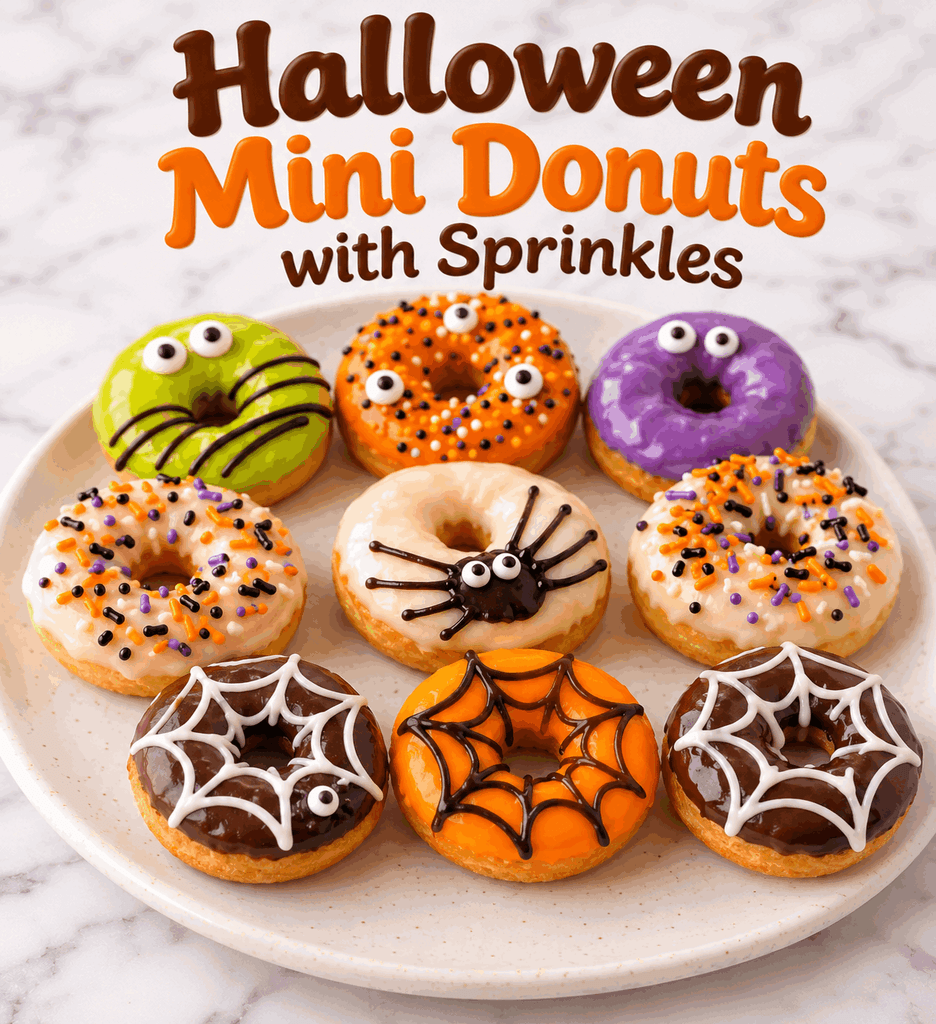
Halloween Mini Donuts with Sprinkles are small, sweet treats decorated with colorful icing, candy melts, and festive Halloween sprinkles. Using ready-made mini donuts makes this recipe especially quick, so kids can spend more time decorating and less time waiting for something to bake. A small decorating squeeze bottle set makes it easier to add neat icing lines and colorful designs.
Prep Time: 15 minutes
Setting Time: 15 minutes
Servings: 12
Ingredients
- 12 plain mini donuts
- 1 cup powdered sugar
- 2 tablespoons milk
- ½ teaspoon vanilla extract
- Orange food coloring
- Purple food coloring
- Green food coloring
- Halloween sprinkles
- ¼ cup melted chocolate chips (optional)
Instructions
- Place the mini donuts on a parchment-lined tray.
- In a small bowl, whisk together the powdered sugar, milk, and vanilla extract until smooth.
- Divide the icing into three small bowls.
- Add a little orange food coloring to one bowl, purple to another, and green to the third. Stir each until the color is even.
- Spoon or drizzle the colored icing over the mini donuts.
- Add Halloween sprinkles while the icing is still wet.
- Melt the chocolate chips, when using, and drizzle a little over some of the donuts for extra decoration.
- Allow the icing to set before arranging the donuts on a serving plate.
9. Peanut Butter Spider Cookies
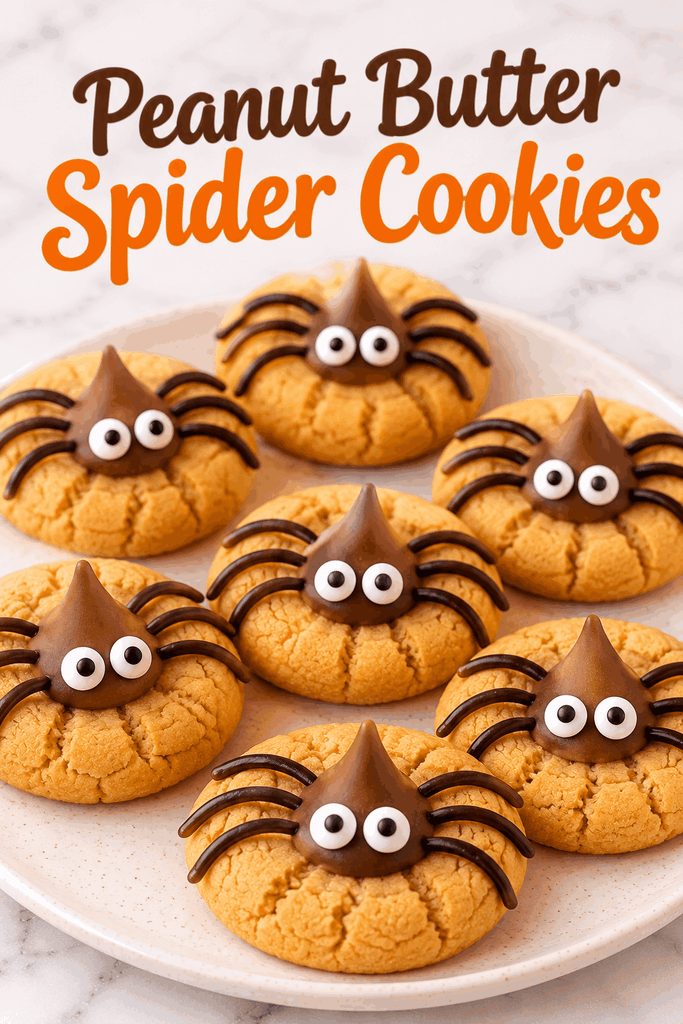
Peanut Butter Spider Cookies are soft, nutty cookies decorated with chocolate candies and small chocolate legs to look like little spiders. They’re a fun Halloween baking project, especially for kids who enjoy adding the finishing touches to homemade cookies. A cookie scoop helps make evenly sized cookies that bake at the same rate.
Prep Time: 20 minutes
Cook Time: 10–12 minutes
Servings: 18
Ingredients
For the cookies:
- ½ cup unsalted butter, softened
- ½ cup creamy peanut butter
- ½ cup granulated sugar
- ½ cup packed brown sugar
- 1 large egg
- 1 teaspoon vanilla extract
- 1¼ cups all-purpose flour
- ½ teaspoon baking soda
- ¼ teaspoon salt
For decorating:
- 18 chocolate truffles or round chocolate candies
- ¼ cup melted chocolate chips
- 36 candy eyes
Instructions
- Preheat the oven to 350°F (175°C). Line a baking sheet with parchment paper.
- In a large bowl, beat the softened butter, peanut butter, granulated sugar, and brown sugar until creamy.
- Add the egg and vanilla extract. Mix until smooth.
- In another bowl, whisk together the flour, baking soda, and salt.
- Gradually add the dry ingredients to the peanut butter mixture. Mix just until a soft dough forms.
- Roll the dough into small balls and arrange them on the prepared baking sheet, leaving space between each one.
- Bake for 10–12 minutes, until the edges are lightly golden.
- Remove the cookies from the oven. While they’re still warm, gently press a small indentation into the center of each cookie using the back of a spoon.
- Allow the cookies to cool completely.
- Use a little melted chocolate to attach one chocolate truffle or round candy to the center of each cookie.
- Attach two candy eyes to each spider body.
- Pipe thin chocolate lines around the body to create spider legs. Let the chocolate set before serving.
Final Thoughts
These 9 easy Halloween treats for kids are a fun way to bring a little extra excitement to Halloween celebrations. From Oreo spider cookies and monster marshmallow pops to mummy brownies and chocolate-covered strawberries, there’s something here for every little Halloween fan.
You don’t need complicated ingredients or fancy decorating skills to make these treats special. A few colorful candy melts, sprinkles, and candy eyes can turn simple homemade snacks into festive Halloween desserts. Pick a couple of favorites, gather the ingredients, and enjoy a fun afternoon of making spooky sweets together.
Oreo spider cookies, chocolate-dipped pretzel rods, monster marshmallow pops, and Halloween mini donuts are some of the easiest treats for kids to make. They require little or no baking, use simple ingredients, and give children plenty of opportunities to decorate.
Several Halloween treats don’t require baking, including Oreo spider cookies, chocolate-dipped pretzel rods, monster marshmallow pops, chocolate-covered strawberries, candy corn popcorn mix, and decorated mini donuts. Adults should still supervise melted chocolate and any other heated ingredients.
Use candy eyes, chocolate drizzle, colored icing, and Halloween sprinkles. Turn sandwich cookies into spiders, marshmallows into monsters, brownies into mummies, and strawberries into little ghosts. Simple decorations can make everyday snacks look festive without requiring special baking skills.